Sunday, December 4, 2011

Gingerbread Martini


Alright. Time for an adult drink. Let's get in the holiday spirit! Nothing says Christmas more than Gingerbread!  Cheers to feelling cozy and getting in the holiday spirit! If I have to listen to Christmas music all day for my daughter, then I want something to eat and drink that goes along with the music! Candles are lit, the fire is on. Bring on the Holiday season!

1 part gingerbread concentrate
1 part Captain Morgan Spiced Rum
1 part Vodka
1 part whipped cream vodka
Ice
2  tsp. sugar
1 tsp. cinnamon
1 tsp nutmeg

Mix together the sugar and cinnamon. Dip the the rim of the martini glass in a bit of vodka, then place the glass rim into the cinnamon, nutmeg, and sugar mixture until the rim is coated. I actually made a bunch of little Martini Shooters with this recipe. Happy Holidays!
Follow Us!
Follow Us on FacebookFollow Us on TwitterFollow Us on bloggerFollow Us on tumblrFollow Us on StumbleUponFollow Us on RSSFollow Us via Email
Follow Me on Pinterest

Saturday, December 3, 2011

Egg Nog Martini


Operation forgive my neighbor isn't going so well. Not yet. The lady is having a party in her backyard right now and the urge to throw water balloons over the fence is pretty strong. Since Revenge is best served cold. I am making a COLD Toddy. An Egg Nog Martini. This is simple to make. If you don't have egg nog already at home, simply make some. You can find the recipe here. Cheers to the weekend. 
1 part Egg Nog
1 part Captain Morgan Spiced Rum
1 part Vodka
1 part whipped cream vodka
Ice
1 tsp. cinnamon
1 tsp. nutmeg

Mix together the nutmeg and cinnamon. Dip the the rim of the martini glass in a bit of vodka, then place the glass rim into the cinnamon and nutmeg mixture until the rim is coated.
In a shaker mix together egg nog, Spiced Rum, Vodka, Whipped Cream Vodka and Ice. Shake it up and pour in prepared glass. 
Follow Us on FacebookFollow Us on TwitterFollow Us on bloggerFollow Us on tumblrFollow Us on StumbleUponFollow Us on RSSFollow Us via Email
Follow Me on Pinterest

Friday, December 2, 2011

Egg Nog

My daughter loves Egg Nog. I don't really like it at all. I like the flavor in my baking, but to just drink it is not my thing. I decided to suprise her this morning with a fresh homemade glass. After all it is Friday. Why not let her splurge a bit? I also have this amazing Sucanat from Wholesome Sweetners. Sucanat stands for SugarCane Natural.s a whole cane sugar. It's made by simply crushing freshly cut sugar cane, extracting the juice and heating it in a large vat. Once the juice is reduced to a rich, dark syrup, it is hand-paddled. Hand paddling cools and dries the syrup, creating the dry porous granules we call Sucanat. Nothing is added and nothing is taken out. Because Sucanat still contains all of the cane's natural molasses, it has a deep brown color and a distinct, natural molasses flavor that enhances many foods. I figured it would be the perfect choice to make the egg nog a little special. Here is how I made it and it was scrumptious!

Egg Nog Recipe adapted from Eggnog.net
6 eggs
3 cups milk
6 tablespoons sugar
2 tablespoons Organic Sucanat
2 teaspoons vanilla extract
1/2 teaspoon nutmeg, ground


In a large bowl, beat the eggs using an electric beater or kitchenaid mixer.
add milk and sugar.
Continue beating until mixture thickens slightly.
Add in the vanilla ground nutmeg.
Cover with plastic wrap and refrigerate for at least 3 hours before you serve. It will keep in the fridge nicely for 3 days. 
Pour your glass and sprinkle with a little nutmeg. 

Follow Us!
Follow Us on FacebookFollow Us on TwitterFollow Us on bloggerFollow Us on tumblrFollow Us on StumbleUponFollow Us on RSSFollow Us via Email
Follow Me on Pinterest

Mini Taco Salads

Here it is, December and still 85 degrees and sunny. I am not complaining! What a blessing this weather is to me! It is strange though. As I have Amy Grant's "Winter Wonderland" blaring through my house, My back door is wide open and the smell of my Orange, Lemon and Lime trees is blowing through my house. We have started fun traditions here though. One of them is the parade of lights on   the San Diego Bay. It is so cool. We spend the day sailing and soaking up the sun. Then we have a nice dinner either that I have prepared on the sailboat, or we go to Peohe's on the water while we dock. At sunset the lights begin. Every sailboat and yacht parades by with lights, music and sometimes dancers. It is a Christmas parade on the water! The best part is I get to view it from my peaceful, crowd free sailboat. The City lights are the backdrop and it really makes for a fabulous SoCal Christmas experience. If you ever make it down to the San Diego bay during December, you gotta try it!

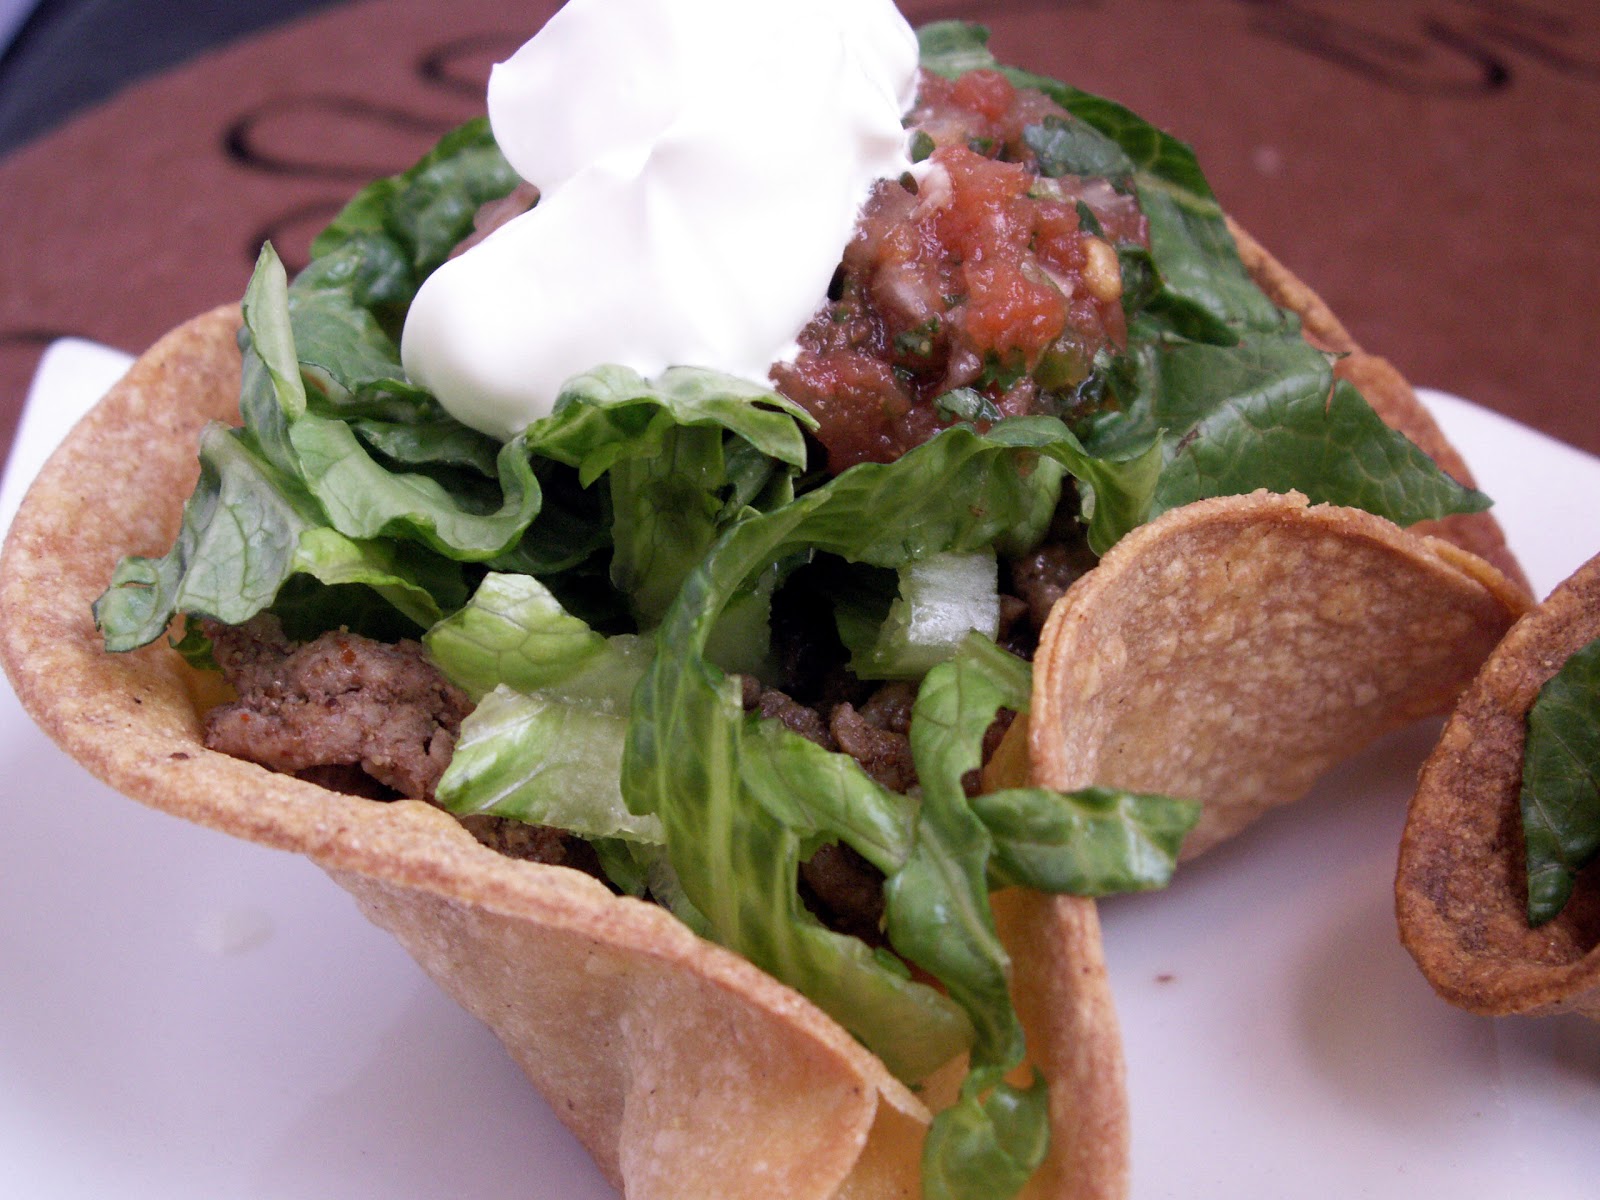
So who else is always looking for quick new ways to serve lunch? I saw these cute Tortilla cups From: Emily Bites and thought, Mini Taco Salads! How cute! Naturally Gluten Free, so you can't beat that! They actually are easy to make and they just add a little something extra to the normal boring lunch. Let me show you how I made them!

6 corn tortillas
Cooking Spray
1/2 lb ground beef or ground chicken 
2 TBSP water
1 tsp cumin
1 tsp chili powder
1 tsp salt
1/2 tsp pepper
1/4 cup chopped onion
2 garlic cloves minced
1 tbsp canola oil
1/4 cup shredded cheese of your choice
Shredded Lettuce
Salsa, Pico de gallo, guacamole, refried beans, sour cream

 Preheat the oven to 375.
 Get out your cupcake pans. Wrap tortillas in a moist papertowel and microwave for 45 seconds. Place the hot tortillas on the backside of your cupcake pans.
 Be sure to spray the cupcake pan so that it will come right off. Repeat with the 5 remaining tortillas, forming  bowls on each tin (as pictured above). Bake in the oven for 8-10 minutes.
 While the tortilla bowls are baking, spray a large skillet with cooking spray and add the ground beef and brown. Add Cumin, Chili Powder, salt, pepper, onion and garlic and 2 TBSP garlic. Simmer for 5 minutes.
In a seperate skillet, heat up your favorite refried beans.
 Let the tortilla bowls cool for a few minutes after removing them from the oven. In each bowl, layer ¼ c meat,  1Tbsp refried beans, 1 Tbsp cheese, Salsa, guac or your favorite taco toppings. Add  some shredded lettuce and sour cream.

Follow Us!
Follow Us on FacebookFollow Us on TwitterFollow Us on bloggerFollow Us on tumblrFollow Us on StumbleUponFollow Us on RSSFollow Us via Email
Follow Me on Pinterest

Thursday, December 1, 2011

Peppermint Bark


I am starting a Gluten-Free Christmas Baking Recipe Round-up that will be posted in the next few days. Get ready to put on a few pounds, or do what I do and give them out to the teenagers that are constantly coming in and out of your house. It is time. Time for the Christmas music to be on, and time for Taylor and Jordan to smell Christmas every time they come in the door. So I am kicking off the baking season with Peppermint Bark. I adapted this recipe from TheBrownEyedBaker. My disclaimer is that if you are gluten free, please double check that the candies and chocolates you use are gluten free. I found bob's sweet stripes which are gluten free candy cane strips. 
This recipe is for a small batch. I want my kids to be able to walk after they are done eating all of this holiday baking I am doing. You can double it for a full recipe.
6 ounces semisweet chocolate

6 ounces. white chocolate

1 TBSP lite corn syrup

3 oz. candy canes, crushed


Look, I cheat. I don't get out the double broiler. I simply Melt the dark chocolate in a glass dish for 3 minutes on 50% power. Stir until smooth and then spread in an even layer on a wax paper-lined baking sheet. Place in freezer to harden, approximately 30 minutes.
Repeat the process. Melt the white chocolate in a glass dish for 3 minutes on 50% power. Stir in corn syrup immediately and stir until smooth.   Spread on top of the dark chocolate layer. Working quickly before the white chocolate sets, sprinkle the crushed candy canes on top and gently press into the chocolate. Refrigerate until complete hard and set, at least 2 hours. 
Break into pieces and enjoy!
Follow Us!
Follow Us on FacebookFollow Us on TwitterFollow Us on bloggerFollow Us on tumblrFollow Us on StumbleUponFollow Us on RSSFollow Us via Email
Follow Me on Pinterest

Personalized TARGETED Nutrition saved me!

Personalized TARGETED Nutrition saved me!
It can save you too! Take the free health assessment (it can even hook up to your DNA test results) to see what your body REALLy needs.